How to Shrink a Volume or Partition Using Disk Management in Windows 10
Most users create multiple partitions on the drive where the system is stored to avoid having to save the files to be stored later to the same drive. That's a prudent action unless the partition allocated for the system is too big to be a waste. In this case, users can use Disk Management to shrink the drive where the system is stored to create new partitions. Use the following steps:
Step 1: Press Win + Q and type in Disk Management.
Step 2: Right-click on the partition you want to shrink and then select Shrink Volume.
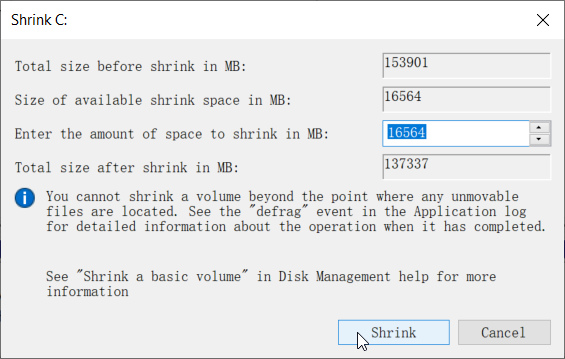
Step 3: Type in the desired sizes you want in the fields in the Shrink window.
Step 4: Click on the Shrink button to proceed.


Comments
Post a Comment