Posts

Showing posts from August, 2020

How to Open Windows Update Troubleshooter in Windows 10

Image
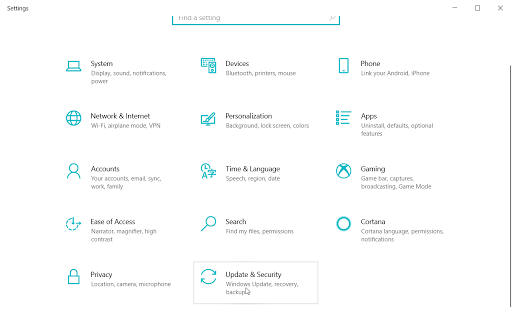
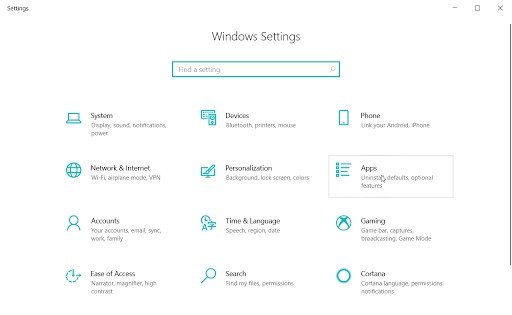
With default settings, Windows Update is turned on in Windows 10. It tackles problems and installs important updates. But at times it may fail to work properly. If you encounter any issues related to Windows Update, you can use the built-in troubleshooter to help you cope with them. Refer to the following steps to learn how to open it. Step 1: Press Win + I to open the Settings application. Step 2: Navigate to  Update & security  >  Troubleshoot . Step 3: On the right page, click on  Windows Update under the  Get up and running  section to run the troubleshooter. Step 4: Follow the on-screen instructions to fix Windows Update issues.

How To Clear Windows Update Cache In Windows 10

Image
This article expounds on how to clear Windows update cache in Windows 10. It's said that many users have been encountered by Windows updates issues, especially when installing one of them. There is an easy way of fixing it by  clearing the Windows Update cache . Refer to the following steps to learn how to do so. Note: Make sure that you have disabled Windows Update service and that after the clearing, remember to enable it. Step 1: Open the drive (C usually) where you have installed the windows 10. Navigate to  Windows\SoftwareDistribution\Download  folder. Step 2: Click on the File in the ribbon of the File Explorer. Step 3: Click on  Change folder and search options .  Step 4:  Under the  View  tab, check the  Show hidden files and folders and drives  option, uncheck  Hide protected operating system files option, and then click on OK . Step 5: Select and delete all the files in the folder to clear  the Windows Update cache.

How to Stop the Windows Update Service in Windows 10

Image
The controversial policy of forced updates in Windows 10 has raised many questions. Although it's convenient and effective, for many users the automatical download and installation are not agreeable. If you are one of them, refer to the following steps to learn how to turn it off. Step 1: Press Win + R to launch Run . Step 2: Type in  Services.msc and click on OK . Step 3: On the right page, scroll down to look for  Windows Update . Step 4: Double-click it on open its Properties . Step 5: Under the General tab, click on Stop , and then click on OK .

A Traditional Way of Manually Cleaning Temporary Files in Windows 10

Image
Windows 10 creates hundreds and thousands of temporary files while you use certain apps. Although it is intended to enhance the user experience, some computers with limited storage space will be crammed with those files. Deleting those files for your PC could free up your PC's storage and consequently enhance its performance. This article delineates a traditional way to clean them, refer to the following steps to learn how. Step 1: Press Win + R to launch  Run . Step 2: Type in  %temp% and then press the  OK button to open the  Temp file. Step 3: Press ALT + A and then press  Del key to delete them. That will move those files to Recycle Bin. If the computer and certain apps later work as usual, you can permanently delete them.

How to View Recently Installed Programs in Winodws 10

Image
This article is intended to help users who want to check how many programs have been installed on your computer and who are concerned to check if there has been any third-party software installed without your permission. Not just that, sneaking malware can get into your computer when you inadvertently click on the wrong button while installing a program. Refer to the following steps to learn how to check your recently installed programs. Step 1: Press Win + Q to open Settings . Step 2: Navigate  to  Apps  >  Apps & features  page. Step 3:  under Apps & features , click on the arrow next to Sort by option to bring up the drop-down menu, and then select Install date.

How to Reset Calculator in Windows 10

Image
The calculator is one of the most stable programs running on Windows. It has been updated several times and always serves as a convenient tool for users. So, if you have any issues while using the program, in most cases, the problem can be tackled by simply resetting it. Refer to the following steps to learn how. Step 1: Press Win + I to open Settings , and then click on Apps . Step 2: On the right page, scroll down to click on Calculator . Step 3: Click on Advanced options . Step 4: Scroll down, click on the  Reset button   under Reset section. Step 5: Click on the Reset button in the warning dialogue to finish the setting.

How to Stop Windows 10 From Restarting to Finish Installing Updates

Image
As users know, Windows 10 automatically downloads and installs available updates. And sometimes it calls for rebooting your PC to complete the update. That's annoying when users are using computers. Luckily, Windows 10 allows you to set active hours to preclude the update from restarting your PC. Refer to the following steps to learn how. Step 1: Press Win + I to open Settings , and then click on  Update & Security. Step 2: Click on the Change active hours button on the right page. Step 3: Turn off the toggle under the  Automatically adjust active hours for this device based on activity option, and then click on Change . Step 4: Set the Start time and End time , and then click on Save to finish the change.

How to Delete Temporary Windows Installation Files In Windows 10

Image
There are many ways computer users can use to free up a bulky amount of space storage on a PC. Deleting temporary Windows installation files is one of them. Sometimes it can free up space that amounts to GBs.  Use to following steps to see how much space you can free up. Step 1: Press Win + E to open File Explorer . Step 2: Right-click on your Windows drive (usually C), and then click on Properties . Step 3: Click on Disk Cleanup . Step 4: In the Files to delete box,  scroll down to check off the box  temporary Windows installation files , and then click on OK button.

How to Change Your Computer Name

Image
Generally, computer users don't pay attention to the names of their PCs. Some of them even don't know their existence. But for users who occasionally connect their computer to a network, having a specific computer is important to them since it helps them recognize themselves and ease several operations. Refer to the following steps to learn how. Step 1: Press Win + I to open Settings, and then click on System . Step 2: On the left part, scroll down, and then click on About . Step 3: On the right page, scroll down to Device specifications section, and click on Rename this PC . Step 4: Type a name for your PC, and then click on next. Step 5: Restart the PC to complete the change.

How to Add Command Prompt to Win+X Power User Menu in Windows 10

Image
Users who are more comfortable with Command Prompt than Powershell may feel vexed by the replacement of Win + X in Windows 10. Although they can launch Command Prompt using search, Run command, and other methods, it would be more convenient for some of them if Command Prompt was available on the Win + X Power User Menu. Refer to the following steps to learn how. Step 1: Press Win + I to open Settings, and click on Personalization . Step 2:  On the left part, click on Taskbar . Step 3: Turn off the toggle under the option  Replace Command Prompt with Windows PowerShell in the menu when I right-click the Start button or press Windows key+X .

How to Reinstall the Wireless (Wi-Fi) Driver in Windows 10

Image
Wi-Fi related problems are not foreign to computer users. Your Windows 10 PC might not be able to connect to the Wi-Fi network or intermittently disconnect from the network. Although those similar problems prevail, there is an easy but efficacious way to solve it. It's to reinstall the Wireless Driver. Refer to the following steps to learn how. Step 1: Press Win + Q , type in Device Manager , and open it. Step 2: In the Device Manager window, expand the Network adapters tree. Step 3: Write down the Wireless Adapter name and number and visit your PC manufacturer's official website to download the corresponding driver. Step 4: Under the Network adapters tree, right-click on the wireless adapter, and select the  Uninstall device option. Step 5: Check off the  Delete driver software for this device option in the confirmation dialogue, and then click on Uninstall . Step 6: Restart your PC and launch the setup of the new driver.

How To Open The Location Of Startup Programs In Windows 10

Image
Many users may have noticed that their computers have begun to take more and more time to boot into windows 10. Although a sophisticated amalgam of factors can lead to that problem, in most cases, it''s because users have inadvertently allowed some software to start with Windows10. It's not difficult to disable startup programs, but you may come across some unknown software and are curious about what it is. In this case, using Task Manager to check where it lays may help you verify its authenticity. Refer to the following steps to learn how. Step 1: Press Ctrl + Shift + ESC to open Task Manager . Step 2: Click on the Startup tab. Step 3: Right-click on a startup program, and then select Open file location to open it.

How To Enable Or Disable The Microphone In Windows 10

Image
 This is an easy guide that delineates how to enable or disable the microphone in Windows 10. Users who are sensitive to data privacy may want to change the settings. Refer to the following steps to learn how. Step 1: Press Win + Q , type in Device Manager , and then open it. Step 2: Expand  Audio inputs and outputs Tree . Step 3: Right-click on the Microphone Array entry, and then click on Disable device to disable it. Step 4: Click on  Yes on the confirmation dialogue. Note: To enable the device, right-click on the entry again, and then click on Enable device option.

How to Auto Delete Files From Downloads Folder in Windows 10

Image
Since it's usual for users to download files from the web using one of those popular browsers,  many of them may inadvertently stock the default download location, Downloads on the C driver, with tons of files, undermining the PC. So, it will be a boon for users if windows 10 computers can automatically delete files from Downloads. Luckily, Windows 10 offers this feature. Refer to the following steps to learn how to set it. Step 1: Press Win + I to open Settings , and click on System . Step 2: Click on Storage of the left list of the window. Step 3: On the right page, click on Configure Storage Sense or run it now . Step 4: Expand the second drop-down menu under Temporary Files , and then select a duration.

How to Reset the Weather App in Windows 10

Image
Windows 10 has a convenient Weather feature for users to check if the weather is propitious. But the feature may inadvertently get corrupted and stop working properly. If users encounter such problems, resetting it will be a quick solution. Refer to the following steps to learn how. Step 1: Press Win + I to open Settings and click on Apps . Step 2: Click on Apps & features on the left part of the window. Step 3: On the right page, scroll down to find Weather , click on it, and then click on  Advanced options . Step 4: Scroll down to the Reset section, click on Reset , and click on the Reset button again. Note: Reset will delete all the Weather data saved on your PC and later reinstall the app.

Stop Windows 10 From Collecting Activity History

Image
In most cases, Windows 10 collect your activity history to enhance the quality of its later service. But for various reasons, some users may want to stop it from garner its personal data. And indeed Windows 10 offers this feature, allowing users to change the default settings. Refer to the following steps to learn how. Step 1: Press Win + I to open Settings and click on Privacy . Step 2: On the left part of the window, click on Activity history . Step 3: On the right page, there are two options available to users that you can set according to your need.

How to Reset The Calendar App In Windows 10

Image
In most cases, resetting the Calendar App in Windows 10 is the easiest and efficient way if the built-in calendar is not working properly. Refer to the following steps to learn how to reset it via settings. Step 1: Press Win + I to open Settings , and then click on Apps . Step 2: On the left part of the window, click on  Apps & features . Step 3: Scroll down to find  Mail and Calendar entry under the App & features section. Step 4: Select it and then click on Advanced options . Step 5: Scroll down, find and click on Reset . And in the confirmation dialogue, click on Reset again.

How To Reinstall The Display Driver In Windows 10

Image
It's a rare but arduous problem among computers that the video and graphics driver is not working properly. Most of us haven't encountered such problems because Windows 10 has automatically performed the needed works related to this one of the most important drivers, such as download, installation and update. But if you sporadically face similar problems. Reinstalling it would be an efficacious solution. Refer to the following steps to learn how to do so. Step 1; Press Win + Q , type in Device Manager and open it. Step 2: In the Device Manager window, expand  Display adapters entry, Step 3: Visit the graphics card manufacturer's website and type in the card name and model number you have seen. And then download its latest version. Step 4: In the Device Manager window,  right-click on the graphics card entry and click on  Uninstall device  option. Step 5: Check off  Delete the driver software for this device  in the confirmation dialogue. Step 6: Restart your computer to

How to Set Data Usage Limit for WI-FI Networks in Windows 10

Image
Users who worry that their computers may blindly exceed the data limit set by their network providers may don't know Windows 10 offers a useful feature to prevent it from happening. And once your pc exceeds the limit, it will send you an alert. Refer to the following steps to learn how to set the limit. Step 1: Press Win + I to open Settings and click on  Network & Internet . Step 2: On the left part of the window, click on Data Usage . Step 3: On the right page, click on the Set limit button in the Data limit section. Step 4: In the window, set the limit according to your need.

How to Reinstall Audio Driver in Windows 10

Image
 Many users may have encountered audio issues while using Windows 10. And the most universal and reasonable way they use to grapple with the problem is to launch the troubleshooter first. However, there is another convenient way users can use if the troubleshooter fails you. It's to reinstall the audio driver. Refer to the following steps to learn how to do so. Step 1: Press Win + Q to open Search , type in Device Manager , and open it. Step 2: In the window that has been brought up, expand the  Sound, video and game controllers entry. Step 3; Right-click on your audio driver. Generally, it's  Realtek High Definition Audio . Step 4: Click on Uninstall device . Select Delete the driver software for this device after the dialogue appears, and then click on Uninstall to proceed and finish the uninstallation. Step 5: Restart your PC. Download the latest version of the audio driver from the manufacturer's website and install it.

How To Uninstall App Add-ons In Windows 10

Image
Users who are unsatisfied with the limited features offered by some apps in Windows 10 may gladly embrace those add-ons introduced by Windows 10. Although some of the add-ons are useful, some users are faced with the problem of how to uninstall those add-ons. Refer to the following steps to learn how to do so. Step 1: Press Win + I to open Settings, and click on  Apps . Step 2: Click on Apps & features , and on the right page, scroll down to find the app to which you have added an add-on. Step 3: Left-click on the app and click on Advanced options . Step 4: In the window that has been brought up, scroll down to go to  App add-ons and downloadable content section, in which you can left-click on an add-on and click on Uninstall to do so.

How to Prevent Apps From Accessing Documents, Pictures & Videos In Windows 10

Image
 Since privacy is an issue that concerns many computer users, Windows 10 has introduced many privacy settings. Most of you may have known that Windows 10 allows users to decide whether or not to grant some accesses, such as camera, calendar, contacts, and other personal information, to apps. But since the release of  Windows 10 Update (version 1803), users can also decide  which apps can access files and folders in documents, pictures, and videos folders. Refer to the following steps to learn how. Step 1: Press Win + I to open Settings , and click on Privacy . Step 2: On the left part of the window, scroll down to find the three options. Step 3: Click on any of them, and on the right page scroll down to go to Choose which apps can access your documents(pictures/videos) library section. Step 4; Click on a toggle next to an app to grant/deny access.

How to Check for Device Drivers Update in Windows 10 Without Third-Party Tools

Image
Users who have disabled automatic driver updates may want to know how to check if there is any new update available for users to download and install. While users can visit PC manufacturers' to download and install wanted drivers. There is an easy way to do so. Refer to the following steps to learn how. Step 1: Press Win + Q , type in Device Manager and open it. Step 2: In the Device Manager window, find the device the updates of which you want to check and expand the category to see its entry. Step 3: Right-click on the device entry, and then click on Update driver . Step 4: Click on  Search automatically for updated driver software . After you select this option, Windows 10 will automatically search your PC and internet for the latest version of the driver of the selected device and install it if it's available.

How to Change Screen Saver Settings in Windows 10

Image
Users who are new to Windows 10 may be confronted by how to accessing screen saver settings since they can not set it via the classic screen saver settings dialogue, which has been removed from Windows 10. Instead, users can refer to the following steps to learn how to access screen saver settings in Windows 10. Step 1: Press  Win + I  to open  Settings , and then click on  Personalization . Step 2: Click on  Lock screen  on the left part of the window. Step 3: On the right page, scroll down and click on  Screen saver settings . Step 4: In the dialogue that has been brought up, expand the drop-down menu under  Screen saver  to change screen saver.