Posts

Showing posts from July, 2020

How to Know When a Driver Was Last Updated on Windows 10

Image
It is sometimes said that drivers released by hardware manufacturers should be held accountable for a lot of issues ordinary computer users encounter. If you are one of the users who have unlikely encountered an unknown problem, checking driver updates is one of the reliable solutions we suggest. Refer to the following steps to learn how to check driver updates. Step 1: Press Win + Q and type in Device Manager to open it. Step 2; Expand the category tree to view devices you are interested in. Step 3: Right-click on the device and select Properties . Step 4: Click on the Details tab and select Install Date under the Property  to learn the last updated date of the driver.

How to Set the Default Tab for the Windows 10 Task Manager

Image
Windows 10 has made a little change to Task Manager, which allows users to set the default tab displayed by Task Manager. As users know, the task manager has a total of seven tabs:  Processes, Performance, App history, Startup, Users, Details, and Services. For users who are more concerned about one aspect than the others, they can refer to the following steps to learn how to set it. Step 1: Press Win + Q and type in Task Manager to launch it.  Step 2: Click on the Options button on the upper-left bar, click Set default tab , and select the desired tab.

How to Enable/Disable Reserved Storage in Windows 10

Image
Reserved Storage is a new feature that made its debut in Windows 10 version 1903. It shows the space size allocated by Windows 10 for the storage of Windows Update, temporary files, system caches, and apps. This feature serves as a safety net lest the computer is so crammed that it halts unpropitiously. What's more, the amount of storage reserved starts at 7GB and climbs as users keep using up the storage.  So, users who would like to disable the Reserved Storage feature in Windows 10 need to make a small change to Windows Registry. Refer to the following steps to learn how to do so. Step 1: Press Win + Q and type in Registry Editor to open it. Step 2: Navigate to HKEY_LOCAL_MACHINE\SOFTWARE\Microsoft\Windows\CurrentVersion\ReserveManager Step 3: On the right page, Double-click on  ShippedWithReserves to open its properties. Step 4: Set the Value data to 0 to disable the Reserved Storage or 1 to enable it.

How to Uninstall Installed Languages in Windows 10

Image
Besides optional features, installed languages are the other appreciable factor that determines the size of Reserved Storage. Users who want to reduce the size of Reserved Storage or who don't need other language packs can refer to the following steps to delete it. Step 1: Press Win + I to open Settings . Step 2: Click on Time & Language and click on Language on the right part.   Step 3: Under the Preferred languages section, select the language you don't desire, and then click on the Remove button to uninstall it.

How to Uninstall Optional Features in Windows 10

Image
Most of the optional features are downloaded and installed by Microsoft and for some users, are useless. Granted, they don't take up a big part of the computer space. But compared to space allocated to Reserve Storage, they are appreciable. Users who want to delete them can refer to the following steps: Step 1: Press Win + I to open Settings . Step 2: Click on Apps and click on Apps & features on the right part. Step 3: Under Apps & features , click on Optional features . Step 4: Click on any of the features you don't want to delete it.

How to Hide or Unhide Drive Letter in Windows 10 File Explorer

Image
A feature in the Windows family is to hide or unhide Drive letter. Windows 10 has inherited the feature too. Users who want to hide or show drive letters can use the following steps: Step 1: Open File Explorer(This PC) Step 2 Click the View option on the upper-left bar and then click on options to select Change folder and search options . Step 3: Under the View tab, find the option Show drive letters . Unchecking/checking its box to hide/show drive letters.

How to Uninstall Cortana in Windows 10

Image
Cortana is a virtual assistant developed by Microsoft, which uses the Bing search engine to perform tasks such as setting reminders and answering questions for the user. Sadly, Powerful and convenient as it seems,  it's not available in all regions/countries. So some users may want to uninstall it. With the May 2020 Update taking effect, Windows 10 now considers Cortana an app, which means users can delete it at will, but they can't delete it in a usual way. Instead, they should use PowerShell and take the following steps to do that: Step 1: Right-click on the Start Menu button at the lower-left corner and select  Windows PowerShell (Admin) option. Step 2: Click Yes on the user account control prompt. Step 3: In the PowerShell window, enter the following command and hit the Enter key. To remove Cortana from the current user: Get-AppxPackage -allusers Microsoft.549981C3F5F10 | Remove-AppxPackage To remove Cortana from all user accounts on your PC: Get-appxpackage -allusers Micr

How to Activate the Start, Taskbar and Action Center Option in Windows 10 Settings

Image
Many users who try to change the color of the Start, Taskbar, Action Center may find that the option is gray and unable to be checked off. Hence the color of the three areas is not compatible with the accent color automatically set by the system or manually set by you. This problem occurs when users configure their computers to apply a light mode. Refer to the following steps to activate the option. Step 1: Press Win + I to bring up Settings . Step 2: Click on the Personalization and click on the Colors on the left part. Step 3: Under the choose your color section, select the Dark or Custom option. Step 4: if you select Dark , you will find the Start, taskbar, and action center option is activated and can be checked off. Step 5: if you select Custom , you need to set your default Windows mode to Dark . Another option, choose your default app mode, doesn't matter in this case. Then you will find the  Start, taskbar, and action center  option is activated and can be checked off.

How to Enable/Disable Search Box From Taskbar in Windows 10

Image
The search box lying beside Start is one of the prominent features you may notice when you start using Windows 10. Granted, for some users, it is useful since they can find any file by typing in the mane in the box. But for other users who have already crammed the taskbar with favorite folders and programs, that will make the taskbar messy. Those who are ambivalent about the feature can refer to the following steps to enable and disable the Search Box to see which one works for him/her. Step 1: Right-click on any blank area of the Taskbar . Step 2: Let the pointer hover over Search . Step 3: Select the desired option.

How to Remove Recycle Bin Icon From Windows 10

Image
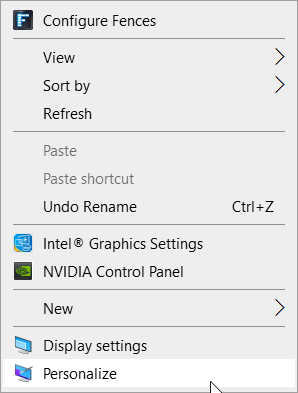
For some users who are tired of poring over the desktop to find desired files, it would serve them well to organize the shortcuts and icons, using software providing this kind of feature, such as Fences. And since Windows 10 allows users to pin the Recycle to Start menu, some who try to remove it from the desktop find that they can't simply delete it in the usual way because of the absence of delete option upon its drop-down menu. Here is the method for removing it from Windows 10. Step 1: Right-click on any blank area of the desktop to bring up the drop-down menu. Step 2: Click on Themes on the left part and scroll down to the Related Settings section on the right page. Step 3: Click on the Desktop icon settings . Step 4: Uncheck the Recycle Bin box within the Desktop icons section. Then the Recycle Bin icon should disappear from the desktop.

How to Enable Delete Confirmation Dialog on Windows 10

Image
Some users who have updated their operating system to Windows 10 may notice that the delete confirmation dialog doesn't show up when they delete a file. For a fraction of users, this may be another way to save excessive operations. But it deters unintentional deletion from being checked. So, if you wanna enable the feature, refer to these steps to do so: Step 1: Right-click on the Recycle Bin icon on the desktop. Step 2: Click on Properties . Step 3: Check off the box " Display delete confirmation dialog " Step 4: Click on Ok .

How to Start Your PC in Safe Mode From Settings in Windows 10

Image
Safe mode starts Windows in a basic state, using a limited set of files and drivers.   Observing Windows in safe mode enables users to narrow down the source of a problem and can help them troubleshoot problems on your PC. Refer to the following steps to learn how to activate safe mode from Settings in Windows 10. Step 1: Press Win + I to open Settings . Step 2: Select Update & Security and click on the Recovery on the left part. Step 3: On the right page, click on the Restart now under the  Advanced startup section. Step 4: After the computer restarts to  Choose an option screen, select Troubleshoot > Advanced options > Startup Settings > Restart . Step 5: After the computer restarts, you'll see a list of options. Select 4 or press F4 to start your PC in Safe Mode. Or if you'll need to use the Internet, select 5 or press F5 for Safe Mode with Networking.

How to Change Your Privacy Options in Windows 10

Image
Digital safety is a spiralling concern among computer users. Granted, many of you may haven't encountered leakages of information. But you can never be too careful about it. Use the following steps to configure your computer. Step 1: Press Win + I to open Settings . Step 2: Click on Privacy . Step 3: Navigate the left part, find the desired section and change their respective settings on the right page according to your preference.

How to Automatically Log Into Windows 10

Image
Windows 10 allows users to set a password to log into it. But for some users who are tired of typing in the passwords every time they use their personal computers, automatical login will be a pleasing feature. Needless to say, Windows 10 offers users a way for users to change the setting. Use the following steps to learn how to do it. Step 1: Press Win + R to open the Run dialog. Step 2: Type in "netplwiz" and click on Ok . Step 3: Select the account you want to grant the permission to automatically log in and uncheck the box " User must enter a user name and password to use this computer ". Step 4: Click on Ok and type in required information in the window that pops up. Step 5: Click on Ok to complete the setting. 

How to Free up Space After Upgrading to Windows 10

Image
Instead of installing some third-party software, Windows 10 users can use a built-in tool, Disk Cleanup, to delete unwanted files and free up their computers. Refer to the following steps to learn how to do it. Step 1: Press Win + Q and type in Disk Cleanup . Step 2: Select the files where you put the previous computer system files. (usually C:) Step 3: Under the Files to delete section, select the types of files you want to delete. You can refer to the descriptions of those respective types written on the box below. Step 4: Click on  Ok to start the cleanup.

How to Use Quick Access to Expedite Navigation

Image
When you start File Explore in Windows 10, on the right part of the interface it displays Quick access . It serves as a folder including various folders that is tantamount to shortcuts. It can be a convenient way to open folders since you may instead need several clicks to arrive at the locations of the folders. To add folders to the sidebar, right-click on any of them and select Pin to Quick access . To unpin folders from the sidebar, right-click on any of them and select Unpin from Quick access . you can also set File Explorer to load the Quick access menu by default when you bring it up, Rather than this PC . Right-click on the Quick access and select Options . Under the General tab, find the " Open File Explorer to " and use the down-drop menu to select Quick access . You may have noticed that there are two germane options under the Privacy section. Both are convenient ways to automatically pin folders to the sidebar.

How to Get Rid of Incessant Notifications in Windows 10

Image
Action Center is one of the best features introduced by Windows 10 since it offers a convenient way for users to view all notifications. But once the computer is glutted with too many notifications, it will be tantamount to a willful and petulant child keeping badgering you. Fortunately, you can easily switch them off using the steps: Step 1: Press Win + Q and type in Settings to open it. Step 2: Click on System . Step 3: Click on the Notifications & actions on the left part. Step 4: On the right page scroll down to go to Get notifications from these senders section. Step 5: Under this section, you can toggle off unwanted notifications.

Fixed: ‘Open With’ Has Disappeared in Windows 10

Image
Do you find that the ‘Open With’ option has disappeared from the context menu users can bring by right-clicking on a file? You don't know why and when it disappeared. But you can positively claim that it disappeared after the up-gradation to Windows 10. If that's the case, use the following steps to bring it back. Launch Notepad . Copy and paste the following code: Windows Registry Editor Version 5.00 [HKEY_CLASSES_ROOT\*\shellex\ContextMenuHandlers\Openwith]@=”{09799AFB-AD67-11d1-ABCD-00C04FC30936}” Click on the File option at the upper-left corner and select Save As ... Type in "Openwith.reg" as the filename, choose All Files, and click on  Save . Close Notepad and open the saved file.\ Press Yes in the confirmation dialogue and try 'Open with' option now. It should reappear and work.

Fixed: Windows Store Can’t Install or Update Apps

Image
Some users found that they couldn't install or update apps through Windows Store anymore after upgrading their computer systems to Windows 10. Many pundits and geeks hold that prodigious cache files flooding your system cause many problems, including the one mentioned. Anyway, a tested solution has solved the problem. Use the following steps to check if it works. Step 1: Press Win + R to launch Run . Step 2: Type " WSReset " and click on Ok . Step 3: A blank and black prompt will pop up and automatically close itself after a few minutes. Step 4: Normally, the  Windows Store will automatically open itself. And if not, open it by yourself and check if it works this time.

Fixed: Windows Update crashed and ceased to work anymore

Image
One of the common problems harasses Winodows 10 users is that the Windows Update is prone to crashes. And what makes it worse is that some crashes could lead to cessation of later updates. If you are one of them, use the following steps to fix it. Step 1: Press Win + R to launch Run . Step 2: Type in "C:\Windows\SoftwareDistribution\Download" and click on Ok . Step 3: Press CTRL + A to select all folders/files in this directory and Delete them. Step 4: Restart your computer and run the Windows Update again to check if it works.

Fixed: Network Icon Disappeared From Taskbar in Windows 10

Image
Since computer users often configure wireless settings in different scenarios, putting the Network icon in taskbar is a default setting in Windows 10. It annoys some users when they find the icon is missing from the taskbar. If you are one of them, Here are two easy ways to cope with the problem. Solution 1: Check out the hidden arrow on Taskbar By Clicking the up arrow beside the notification area, you can see hidden icons.  Users can move icons into/out of the hidden area by simply dragging them, making the taskbar neater.  Solution 2: Turn on Network icon in Taskbar settings Step 1: Right-click on the Taskbar and choose ‘ Taskbar settings ’.  Step 2: Scroll the right page to the ‘ Notification area ’.  Step 3: Click on Turn system icons on or off .  Step 4: On this page, you can choose the icons you want to appear on the taskbar. Click on the toggle of “ Network ” to turn it on.  Network Icon Failure Another problem users could encounter is that the status of Network fails to indic

How to Change the Screen Brightness in Windows 10

Image
The brightness of your computer monitor is very important for the health of your eyes. It's a basic task to adjust the display settings on Windows 10. Use the steps written below to adjust it. Step 1: Right-click on the Start menu and select Settings . Step 2: Click on the System button. Step 3: Under the Display section on the right page you will find the Brightness and color . Step 4: Use the Change brightness slider. To the left will be dimmer, to the right brighter