Posts

Showing posts from October, 2020

How to Set up a Microphone in Windows 10

Image
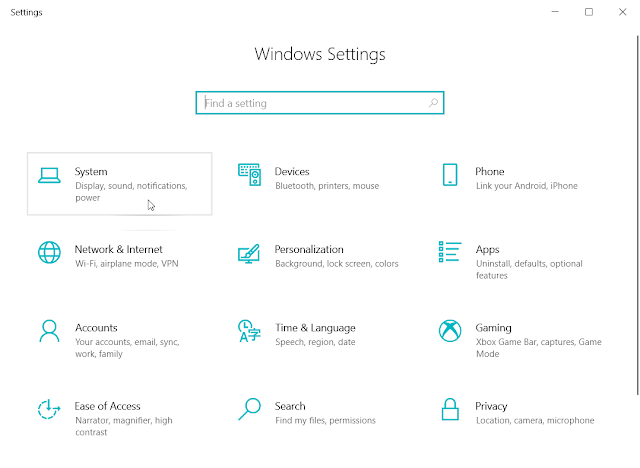
The microphone is an important input device for users who frequently attend online meetings. This article lays out the steps you can use to set up a new microphone. Step 1: Make sure that the Microphone is connected to the computer and its driver is installed. Step 2: Press Win + I to open Settings. Step 3: Navigate to System > Sound. Step 4: Scroll down the right page to the Input section. Step 5: Click on the drop-down menu under it and then select the device you intend to use.

How to Turn on Public Folder Sharing in Windows 10

Image
Users who want to share files on their computer with and grant access to other users on the same computer or network can use the following guide to change the settings. Step 1: Press Win + Q, type in Control Panel, and then open it. Step 2: Navigate to  Network and Sharing Center >  Change Advanced Sharing Settings Step 3: Expand the All Networks option. Step 4: Scroll down the page to find the Public Folder Sharing section. Step 5: Tick off the box next to T urn on sharing so anyone with network access can read and write files in the Public folders. Step 6: Click on Save changes.

How to Enable Startup Sound in Windows 10

Image
Users who want to enable the startup sound in Windows 10, which signals that the computer has booted successfully, can use the following guide to do so. Step 1: Right-click on Start Menu and then click on Settings. Step 2: Navigate to Personalizations > Themes. Step 3: Click on the Sounds button on the right page. Step 4: Tick off the box next to Play Windows Startup sound. Step 5: Click on OK to confirm the settings.

How to Change Touchpad Sensitivity via Settings in Windows 10

Image
Users who are not satisfied with the current sensitivity of the touchpad can refer to the following steps to learn how to change it. Step 1: Press Win + I to open Settings. Step 2: Navigate to Devices > Touchpad. Step 3: Look for Touchpad sensitivity on the right page. Step 4: Click on the drop-down menu under it and select the one that suits you.

How to Prevent Windows 10 Screen Display From Turning Off

Image
Although it helps sustain battery and screen life to automatically turn off the screen, some users prefer to keep it working no matter they are using the computer or not. Refer to the following steps to disable this feature. Step 1: Right-click on the Start Menu button and click on Settings. Step 2: Head to System > Power & sleep. Step 3: Look for the screen section on the right page. Step 4: Respectively click on the two drop-down menus and then select Never.

How to Delay Windows Updates via Settings in Windows 10

Image
If you are annoyed by the persistent pop-ups of update notifications and want to delay them slightly. Use the following steps to do so. Step 1: Right-click on the Start Menu button and click on Settings. Step 2: Navigate to Update & Security > Windows Update. Step 3: Click on the Pause updates for 7 days option on the right page to delay it.

How to Rotate Your Screen in Windows 10

Image
Users of multiple displays sometimes want to rotate one of those displays. Certain computers allow users to rotate their displays by pressing Ctrl+ Alt + an arrow key. The right and left key turn the screen 90 degrees, while the up key brings the screen to its normal position and the down key turns it upside down. If you can't rotate your screen in this way, you can try rotating it via settings. Step 1: Press Win + I to open Settings. Step 2: Navigate to System > Display. Step 3: Look for the Display orientation option on the right page. Step 4: Select an option from the drop-down menu under it.

How to Enchance Search Experience in Windows 10

Image
If you find that searches are taking too long in Windows 10, there is a setting that allows you to narrow down its range. Refer to the following steps to learn how to do so. Step 1: Press Win + Q, type in settings, and open it. Step 2: Navigate to Search > Searching Windows. Step 3: Select the Classic option to narrow down the lists of things Search scans. It only applies to Libraries and Desktop, while Enhance will search the whole computer.

How to Preview the Desktop in Windows 10

Image
To users of Windows 7, the Show desktop button at the lower-right corner of the desktop is quite handy. In windows 10, It has shrunk and turned into an almost invisible button next to Date & time. On top of that, the button allows users to preview the desktop by letting the mouse cursor hovering on it. If you can't do that, use the following steps to set it. Step 1: Right-click on The Start Menu button. Step 2: Click on Settings. Step 3: Navigate to Personalization > Taskbar. Step 4: On the right page, switch on the toggle under Use peek to preview the desktop when you move your mouse to the show desktop button at the end of the taskbar .

How to Factory Reset Windows 10 via Settings

Image
If your computer is not running as well as it should be, maybe it's time to reset it to factory settings. Use the following steps to do so. Step 1: Press Win + I to open Settings. Step 2: Navigate to Update & Security > Recovery . Step 3: Click on Get started under the Reset this PC title. Step 4: Follow the instruction to reset your computer.

How to Turn off Desktop Notifications in Windows 10

Image
Incessant and unexpected popping up of notifications in Windows 10 is rather annoying. Users who want to get rid of it can use the following steps: Step 1: Press Win + I to open Settings. Step 2: Navigate to System > Notifications & actions. Step 3: Look for the Get notifications from apps and other senders option in the notifications section on the right page. Step 4: Turn off the toggle under the option.

How to Create a Local User Account Without Password in Windows 10

Image
This guide tells users how to create a local account without a password. Step 1: Press Win + I to open Settings. Step 2: Navigate to Setting > Accounts >  Family & other users . Step 3: On the right page, click on the  Add someone else to this PC option. Step 4: Enter a user name and leave the two password options empty. Step 5: Click on next to create a local user account without a password.

How to Create Keyboard Shortcuts for Programs in Windows 10

Image
If you want to launch a program that's not on the desktop, type in its name in the search bar and open it is an easy way. But there is a quicker way: create a keyboard shortcut for the program, which can be done by using the following steps. Step 1: Press Win + Q and type in the program name.  Step 2: Right-click on it and click on open the location. Step 3: In the new window, right-click on the program, click on Send to, and then click on Desktop(create shortcut). Step 4: Right-click on the program on the desktop and then click on Properties. Step 5: Switch to the Shortcut tab and press a key in the box next to the Shortcut key option.

How To Disable The CapsLock Key via Registry In Windows 10

Image
Usually, there are two ways for users to type a letter in capitals, activating the Capslock key or pressing the Shift key while typing a letter. The former sometimes impedes users as they often press it inadvertently. To disable it is a viable option. Users can do so by using the following steps. Step 1: Type in Registry Editor in the search bar and open it. Step 2: Navigate to  Computer\HKEY_LOCAL_MACHINE\SYSTEM\CurrentControlSet\Control\Keyboard Layout Step 3: Right-click on an empty space of the right part, click on New and then click on Binary Value. Step 4: Name the new Binary Value as ScanCode Map. Step 5: Double-click on ScanCode Map and then enter the following code within the Value data section. Step 6: Click on OK to save the setting and reboot your computer to immediately validate it.

How to Stop Windows 10 From Blocking Downloaded Files

Image
Many users have reported that they couldn't open files downloaded from the internet. The reason for the problem is that the operating system, Windows 10, blocks those files. To prevent files from being blocked by Windows 10, users need to disable the new security feature, Attachment Manager, by editing the registry. Refer to the following steps to learn how to do so. Step 1: Press Win + Q, type in and open Registry Editor. Step 2: Navigate to  HKEY_CURRENT_USER\Software\Microsoft\Windows\CurrentVersion\Policies\Attachments. Note: If Attachments is absent under Policies, right-click on the Policies entry, click on New and Key , and name it as Attachments. Step 3: Select the Attachments entry. Step 4: On the right page, right-click on the blank area, click on New, select  DWORD (32-bit) Value  and name it as  ScanWithAntiVirus . Step 5: Double-click on the  ScanWithAntiVirus value and change the value data of it to 1 to turn off the Attachment Manager feature.

How to Add Run Command to Start Menu or Taskbar in Windows 10

Image
Concerning launching the command, although most users of Windows 10 prefer using Win + R than opening the start menu to look for it, for users who want to open it with a mouse, a command icon lying on the start menu can be pretty convenient. Refer to the following steps to learn how to pin command to Start Menu. Step 1: Press Win + Q to open search. Step 2: Type in Command Prompt. Step 3: Right-click on it and select Pin to Start.

How to Create Desktop Shortcut for Settings in Windows 10

Image
The settings app is a new feature introduced by Windows 10 that contains options that are available in Control Panel and is intended to replace it once the new feature has all the options the Control Panel covers. Users who are interested in creating a desktop shortcut for the application can use the following steps: Step 1: Press Win + Q and type in Settings. Step 2: Right-click on it and then select Pin to Start. Step 3: Drag and Drop the Setting icon on the start menu to the desktop to create a desktop shortcut for it.

How to Change Mouse Pointer Size and Color in Windows 10

Image
If users of versions of Windows Before 10 want to customize the size of the mouse pointer, they need to download a third-party tool. That's not the situation for now if they upgrade to Windows 10, which offers an easy way for users to make such changes. Refer to the following steps to see how it works. Step 1: Press Win + I to open settings. Step 2: Navigate to  Ease of Access >  Mouse Pointer Step 3: Drag the slider to change your pointer size.

How to Make the Start Menu Launch Faster in Windows 10

Image
It's reported that some users of Windows 10 have encountered an unpleasant delay after clicking on the Start Menu button, resulting in a menu appearing more slowly than some previous version of Windows. To fix this problem, use the following steps: Step 1: Press Win + R to open Run command box. Step 2: Type in Sysdm.cpl and then press enter. Step 3: Switch to the Advanced tab. Step 4: Click on Settings in the Performance section. Step 5: Uncheck the box labeled as  Animate windows when minimizing and maximizing under the Visual effects tab. Step 6: Click on OK.

How to Make Taskbar Icons Bigger via Settings in Windows 10

Image
Users who have installed Windows 10 or upgraded it from one of the previous versions may find that the icons on the taskbar are a bit smaller than the previous one, making them feel weird. To secure the previous, familiar view of the icons, use the following steps: Step 1: Press Win + Q, type in Settings, and open it. Step 2: Navigate to Personalization > Taskbar. Step 3: Switch Off the toggle under the Use small taskbar buttons title.

How to Disable Inactive Window Scrolling via Settings in Windows 10

Image
As a convenient feature that can only be used by installing a third-party tool in Windows 8/7, inactive window scrolling has made its debut in Windows 10. It allows users to scroll an inactive window by hovering the mouse cursor over it. To enable or disable it, you can use the following steps: Step 1: Right-click on the Start Menu button and click on Settings. Step 2: Navigate to Devices > Mouse. Step 3: Switch the toggle under the title, Scroll inactive windows when I hover over them, to satisfy your need.

How To Uninstall Fonts Via settings In Windows 10

Image
There are many built-in fonts in Windows 10 and users are allowed to tweak their settings, like previewing, installing, or uninstalling via settings. This article lays out the steps of how to uninstall fonts in Windows 10. Refer to the following steps: Step 1: Press Win + I to open Settings. Step 2: Navigate to Personalization > Fonts. Step 3: Scroll down the right page and click on the font you want to uninstall. Step 4: In the new window, click on Uninstall to delete it.

How to Change Your Computer Name via Settings in Windows 10

Image
The computer name is needed when you want to establish a connection between multiple PCs or share files on a network. If users don't set it, the computer name will look like a string of random numbers and letters, preventing users from recognizing and remembering it. To create an identifiable and interesting name, use the following steps: Step 1: Press Win + I to open Settings. Step 2: Navigate to System > About . Step 3: Scroll down the right page to look for the Rename this PC button and click on it. Step 4: Enter a fantastic name and click on next and then Restart now to validate your change.

How to Make a Standard User Account an Administrator in Windows 10

Image
Although users can replace their current administrator account by creating a new one, there is a simpler way: make a standard user account an administrator one. Check out the following steps to learn how to do so: Step 1: Right-click on the Start Menu button and then click on Settings. Step 2: Navigate to  Accounts  >  Family & other users . Step 3: Click on the account on the right page that you want to change to the Administrator account. Step 4: Click on Change account type . Step 5: Under the Account type title, select Aministrator and then click on OK.

How to Enable or Disable Sleep Mode in Windows 10

Image
Sleep mode is a computer state in which it costs the computer only a small amount of power and allows users to resume their work quickly by a click on the mouse or pressing any key on the keyboard. It's a handy feature that help users save battery on the condition that the computer is in a state of inactivity for 15 or 30 minutes. But it can sometimes interrupt background work, such as download. Hence, if you wan to disable, use the following steps: Step 1: Press Win + I to open Settings. Step 2: Navigate to System > Power & Sleep. Step 3: There are two options under the sleep title on the right page. Change the settings to satisfy your need.